


Welcome
to our acamey where we help you take the steps toward your dreams, whether it's through the art of tattoos or the world of aesthetics. passionate about guiding you on your unique journey, empowering you to express yourself and embrace your individuality. Join us as we explore the limitless possibilities that await you!

courses
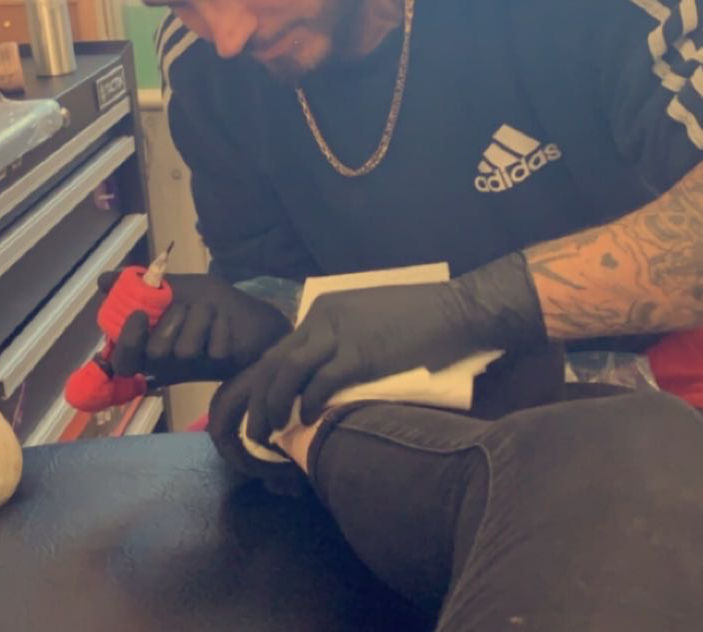
Tattoo Course
A 3-day tattoo course is a very intense, condensed introduction to the art of tattooing. While it's unlikely to turn you into a professional artist in such a short time, it can give you a good foundation, helping you to understand the basics of tattooing, the necessary equipment, safety standards, and the artistic principles involved. Here's an outline of what such a course might cover:
Day 1: Introduction to Tattooing and Basic Skills
Morning Session: Overview of Tattooing
-
History of Tattooing: Origins, cultural significance, and evolution of tattoo art.
-
Tattooing Styles: Traditional, neo-traditional, realism, black and grey, watercolor, etc.
-
Tattoo Equipment Overview:
-
Tattoo machines (rotary vs. coil)
-
Needles and their uses (liners, shaders, magnums, etc.)
-
Tattoo inks and pigments
-
Power supply, foot pedal, and clip cords
-
-
Tattoo Setup & Breakdown: Hygiene and safety protocols, setting up a sterile workspace.
-
Importance of sanitizing hands, surfaces, and equipment.
-
Understanding disposable materials (gloves, needles, tubes, etc.)
-
Afternoon Session: Basic Stencil and Line Work
-
Creating a Stencil: Learn how to transfer a design to the skin using stencil paper.
-
Basic Line Drawing: Practice clean lines on synthetic skin or practice pads.
-
How to use the tattoo machine to create precise and consistent lines.
-
Adjusting machine settings (voltage, needle depth, etc.) for line work.
-
Day 2: Inking Techniques, Safety, and Design Principles
Morning Session: Shading, Coloring, and Texture
-
Shading Techniques:
-
Black-and-grey shading
-
Soft shading and gradient techniques
-
How to shade with different needles
-
-
Coloring: Learn how to pack color, gradient coloring, and working with pigments.
-
Working with Different Needle Configurations:
-
Liner needles (round and flat)
-
Shader needles (magnum, curved magnum)
-
Afternoon Session: Skin Anatomy & Safety Protocols
-
Skin Anatomy: Understanding skin layers and how tattoos interact with the skin.
-
How to avoid damaging the skin and creating unwanted scars.
-
-
Hygiene and Bloodborne Pathogens:
-
The importance of sterilization
-
How to avoid cross-contamination (single-use needles, proper disposal)
-
Understanding infection risks and handling bloodborne pathogens.
-
-
Tattoo Aftercare: How to advise clients on proper aftercare (healing times, ointments, preventing infections).
Day 3: Hands-on Practice and Tattooing on Skin
Morning Session: Preparing for Real Tattoos
-
Design Customization: Work with clients to design tattoos that match their vision and your style.
-
Use of references and adapting designs for different body parts.
-
Ensuring the design fits well on the body, with proper flow and proportions.
-
-
Mock Tattoo on Skin: Practice on pig skin or synthetic skin (often used for beginner practice).
-
Experiment with different needle types.
-
Work on creating clean lines, smooth shading, and color packing.
-
Afternoon Session: Supervised Live Tattooing
-
Tattoo on Real Skin: Some advanced courses may allow a trainee to perform live tattooing on a model (under supervision). This will typically be a very simple, small design.
-
Aftercare & Final Touches: Learning how to clean, bandage, and explain aftercare instructions to clients.
-
Q&A and Feedback: Final review of the skills learned, along with tips for continuous improvement and next steps for advancing in the field.
Key Skills to Develop Throughout the Course:
-
Precision and Control: Learning how to control the tattoo machine for clean, consistent lines and shading.
-
Artistic Development: Understanding proportions, symmetry, and composition in tattoo design.
-
Client Communication: How to interpret client ideas and turn them into custom tattoo designs.
-
Tattoo Aftercare Knowledge: Educating clients on aftercare to ensure proper healing and minimize infection risk.
Course Materials You Might Need:
-
Tattoo Machine (coil or rotary)
-
Power Supply & Foot Pedal
-
Needles (variety of liners and shaders)
-
Tattoo Inks
-
Stencil Paper & Thermal Copier
-
Practice Skins (Synthetic or Pigskin)
-
Sterilization Equipment (Autoclave or Disinfectants)
-
Gloves & Disposable Supplies
-
Aftercare Products
Things to Consider After the Course:
-
Apprenticeship: While a 3-day course is a great introduction, tattooing professionally usually requires a lengthy apprenticeship, where you’ll work under the supervision of a skilled artist.
-
Practice: Mastering tattooing requires practice—lots of it! You'll need to practice on synthetic skin or pig skin and work your way to tattooing real skin.
-
Building a Portfolio: As you progress, documenting your work is important for building a reputation and attracting clients.
-
Continued Learning: Tattooing is an evolving art, so continuing to learn new techniques, keeping up with safety standards, and expanding your artistic range are essential for long-term success.
While a 3-day course can give you a head start, it's crucial to understand that tattooing is a highly skilled and artistic profession that demands years of practice and dedication. If you're serious about becoming a professional tattoo artist, consider seeking an apprenticeship with an experienced tattoo artist or studio after the course to continue your education.
body piercing course
A 2-day piercing course is typically designed to provide both theoretical knowledge and hands-on practice for individuals interested in becoming professional piercers. The content and structure may vary slightly depending on the instructor or school, but generally, you can expect to cover the following key topics:
Day 1: Introduction & Theory
-
Basic Anatomy & Physiology:
-
Understanding human anatomy, particularly the areas where piercings are performed (ears, nose, navel, etc.).
-
Learning about skin layers, cartilage, and tissue healing to minimize complications.
-
-
Sterilization & Hygiene:
-
Detailed instructions on sterilizing equipment and maintaining a sterile environment.
-
Safe practices for preventing cross-contamination and infection.
-
Understanding the importance of sanitation, autoclaving, and using disposable materials.
-
-
Types of Piercings:
-
Overview of popular piercings: ear, nose, lip, eyebrow, navel, genital, and dermal.
-
Discussing different jewelry types (material, size, shape) and how to choose the right one for different piercings.
-
-
Piercing Tools & Equipment:
-
Overview of tools used in piercing (needle types, clamps, forceps, jewelry insertion tools, etc.).
-
How to select and properly use tools for each procedure.
-
Introduction to different jewelry types and materials (titanium, niobium, gold, etc.).
-
-
Health & Safety Regulations:
-
Legal requirements and health regulations for professional piercing.
-
Local laws regarding age limits, consent forms, and studio requirements.
-
Professional ethics and maintaining client confidentiality.
-
Day 2: Hands-On Practice & Techniques
-
Piercing Techniques:
-
Step-by-step walkthrough of piercing procedures.
-
Practice in marking the piercing site to ensure symmetry and accuracy.
-
Techniques for performing safe, clean piercings with minimal discomfort.
-
-
Handling Complications:
-
Managing bleeding, swelling, and any potential complications during or after the piercing.
-
Identifying signs of infection, and learning how to handle them.
-
How to deal with piercing rejection and other adverse reactions.
-
-
Aftercare and Healing:
-
Instructions on proper aftercare, including cleaning techniques and healing timelines.
-
Understanding potential healing issues (e.g., keloids, hypertrophic scarring) and how to minimize them.
-
Educating clients on how to care for their piercings post-procedure.
-
-
Practice on Models:
-
Depending on the course structure, you may have the opportunity to perform piercings on live models under the supervision of an experienced instructor.
-
Observation of professional piercers performing piercings, followed by supervised practice.
-
-
Client Interaction & Consultation:
-
Role-playing consultation scenarios to practice explaining procedures, risks, and aftercare to clients.
-
Understanding how to address client concerns and provide a comfortable experience.
-
-
Final Assessment & Certification:
-
Many courses will include an evaluation where you demonstrate your understanding of the material and your practical skills.
-
Upon successful completion, you may receive a certificate, which can be a step toward working as a professional piercer (though additional experience and apprenticeship might still be required).
-
Key Takeaways:
By the end of the course, you should have:
-
A solid understanding of piercing anatomy, equipment, and techniques.
-
Hands-on experience in performing basic piercings under supervision.
-
Knowledge of sterilization, hygiene, and safety protocols.
-
Confidence in conducting client consultations and aftercare education.
It’s important to note that a 2-day course will only provide foundational knowledge, and additional practice or apprenticeship under a licensed piercer may be required to gain proficiency and work independently.
Aesthetics course
A 3-day aesthetics course typically offers a focused introduction to various cosmetic procedures and techniques within the field of aesthetic medicine. While the exact curriculum can vary depending on the course provider and location, most 3-day aesthetics courses cover a variety of foundational topics and practical skills. Below are some common areas you can expect to learn during such a short course:
1. Introduction to Aesthetic Medicine
- Overview of the Aesthetic Industry: An introduction to the aesthetics field, including the different treatments and services offered in clinics.
- Legal and Ethical Considerations: Discuss the regulatory standards, patient confidentiality, and the ethical guidelines in the field of aesthetics.
- Health and Safety Protocols: Best practices for infection control, sanitation, and maintaining a safe treatment environment.
2. Botulinum Toxin (Botox) Injections
- Theory of Botulinum Toxin: Understanding how Botox works to reduce wrinkles by temporarily paralyzing muscles.
- Indications and Contraindications: Learning which conditions Botox can treat (e.g., wrinkles, migraines) and who may not be a good candidate for treatment.
- Injection Techniques: Hands-on practice with various injection sites, such as the forehead, crow’s feet, and frown lines.
- Managing Potential Side Effects: How to deal with common complications like bruising, swelling, and drooping eyelids.
3. Dermal Fillers
- Types of Dermal Fillers: Overview of hyaluronic acid-based fillers and other types (e.g., calcium hydroxyapatite, poly-L-lactic acid).
- Anatomy of the Face: Key facial landmarks, vascular structures, and safety zones.
- Injection Techniques: Hands-on training for injecting dermal fillers into areas such as the cheeks, lips, nasolabial folds, and marionette lines.
- Managing Complications: How to recognize and address potential complications like vascular occlusion, lumps, or infections.
4. Skin Rejuvenation Treatments
- Chemical Peels: Understanding different types of chemical peels and their benefits for skin texture, tone, and clarity. Techniques for applying the peels safely.
- Microneedling: Learning the procedure for collagen induction therapy, including how to use a dermaroller or dermapen device to improve skin texture and reduce fine lines.
- **Laser Treatments**: Basic knowledge of laser technologies (e.g., fractional CO2, IPL, and Q-switch lasers) and their application in aesthetics (e.g., pigmentation removal, skin resurfacing).
5. Client Consultation and Aftercare
- Conducting Consultations: How to assess clients’ needs and expectations, and how to manage consultations for injectable and non-injectable treatments.
- Creating Treatment Plans: How to formulate personalized treatment plans based on clients' goals, skin type, and concerns.
- Aftercare Guidelines: Educating clients on post-treatment care, potential side effects, and how to manage recovery.
6. Practical Hands-On Experience
- Supervised Practice: A large part of a 3-day course will involve hands-on practice under the supervision of experienced practitioners. This could include injecting Botox and dermal fillers, performing chemical peels, or microneedling.
- Model Work: You may have the opportunity to practice on live models to gain real-world experience and develop confidence in your skills.
7. Assessment and Certification
- Theory Exam: A theoretical exam to test your knowledge of anatomy, treatment protocols, safety measures, and product knowledge.
- Practical Exam: Some courses may require a practical exam where you demonstrate your skills in front of instructors.
- Certification: Successful completion of the course will typically provide a certificate, though requirements for practicing legally may vary depending on the region or country.
8. Post-Course Support
- Ongoing Support: Some courses offer access to continued mentorship or support groups to help you as you start your aesthetic practice.
- Continuing Education: Information on advanced courses, workshops, or seminars to deepen your expertise in specific treatments.
What You Can Expect to Learn in a 3-Day Aesthetics Course:
- Fundamentals of aesthetics and safety
- Botulinum toxin and dermal filler techniques
- Skin rejuvenation methods like chemical peels and microneedling
- Consultation skills and client care
- Real-world practice and hands-on experience
- How to avoid and manage complications
Who Should Take These Courses?
- Beauty Professionals: Estheticians, cosmetologists, and other beauty professionals looking to expand their skill set.
- Healthcare Professionals: Nurses, doctors, and physician assistants who want to specialize in non-surgical aesthetic treatments.
- Entrepreneurs: Individuals looking to start their own aesthetic clinic or add aesthetic services to their existing practice.
While these courses offer a solid foundation, keep in mind that hands-on experience, practice, and sometimes ongoing education are key to becoming proficient in aesthetic treatments. Always check the credentials of the course provider and ensure that the training aligns with your professional goals and legal requirements in your area.

CONTACT US
ADDRESS
NORTHAMPTON
NN55LD
OPENING HOURS
Monday - Sunday: 9am - 7pm
What We Offer
20 hr
900 British pounds
16 hr
400 British pounds
24 hr
1,200 British pounds
1 hr
99 British pounds